How to Make Classic Crepes Perfectly Every Time
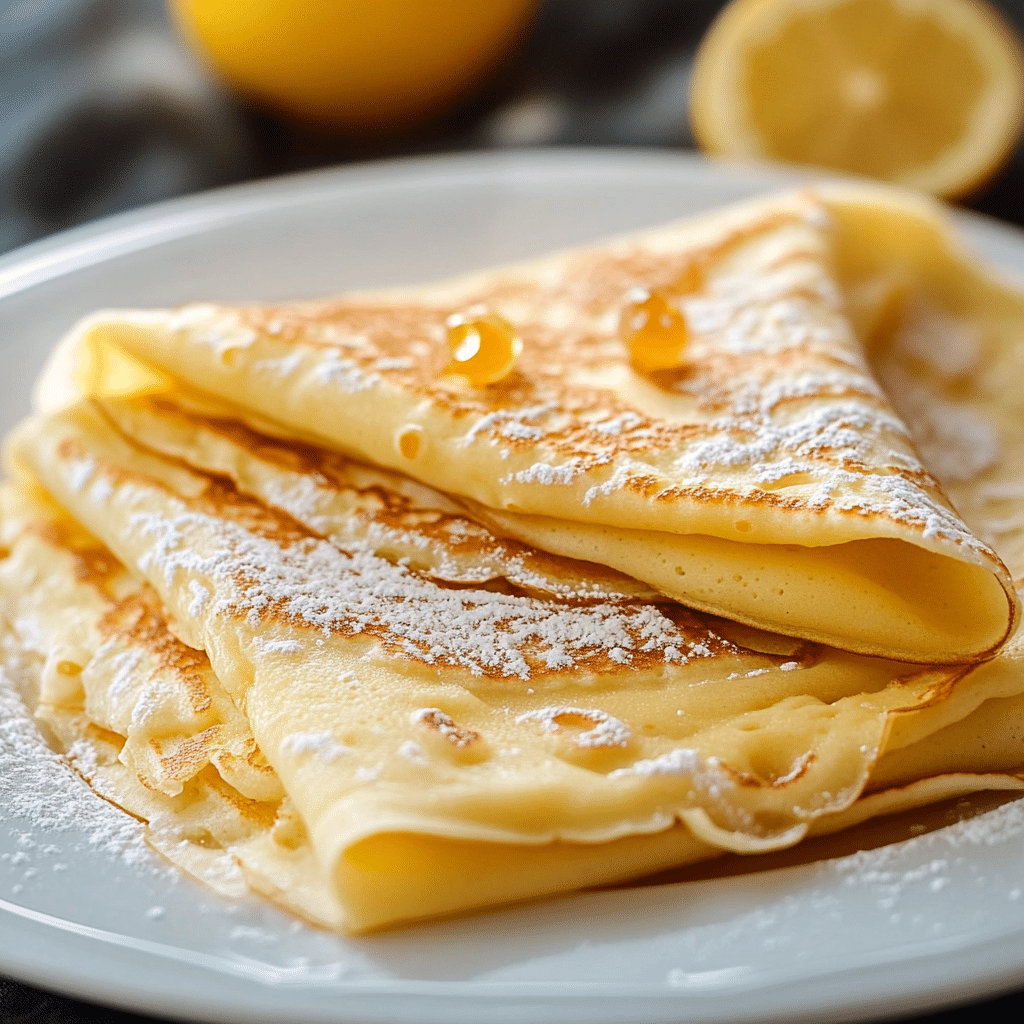
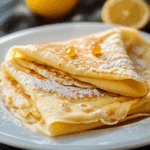
If you’ve ever dreamed of making light, thin, and perfectly tender pancakes that are as versatile as they are delicious, then mastering Classic Crepes is your next best kitchen adventure. From breakfast to dessert, these delicate French pancakes can be dressed up or down, filled with anything from fresh fruit to savory fillings. Learn the secret to making Classic Crepes flawlessly every time with our easy, step-by-step recipe for thin, tender, and delicious results that will have everyone asking for seconds.
Why You’ll Love This Recipe
- Effortless Elegance: Classic Crepes look fancy but are surprisingly simple to make, perfect for impressing guests or treating yourself.
- Versatility at Its Best: Whether sweet or savory, Classic Crepes adapt to any flavor combination, meal, or occasion.
- Quick and Easy: With just a few basic ingredients, you can whip up a batch in under 30 minutes.
- Healthy and Light: Thin and low in fat, crepes are a lighter alternative to thicker pancakes without sacrificing taste.
- Impressive Yet Inexpensive: The ingredients are budget-friendly, making this a delicious and cost-effective treat.
Ingredients You’ll Need
All you need for the perfect batch of Classic Crepes are simple, staple ingredients that come together to create the ideal texture and flavor. Each element plays a crucial role in giving you that beautiful, whisper-thin pancake you’re aiming for.
- All-Purpose Flour: Provides the structure and smooth texture needed for tender crepes.
- Eggs: Bind the batter and add richness for supple, flexible crepes.
- Milk: Adds moisture and lightness, helping create a thin, pourable batter.
- Melted Butter: Enhances flavor and prevents sticking, ensuring easy flipping and golden edges.
- Salt: Balances the sweetness and rounds out the flavor.
- Vanilla Extract (Optional): Adds a subtle hint of warmth when making sweet crepes.
Variations for Classic Crepes
Classic Crepes are a perfect blank canvas, and customizing them is half the fun. Whether you have dietary preferences or want to switch up the flavor profile, these variations are easy and delicious.
- Gluten-Free Version: Substitute all-purpose flour with a gluten-free blend for a safe but equally tender option.
- Dairy-Free Twist: Use almond, oat, or soy milk instead of cow’s milk to cater to lactose intolerance.
- Chocolate Crepes: Add 1-2 tablespoons of cocoa powder into the batter for a rich, chocolaty twist.
- Savory Crepes: Omit the vanilla and sugar, then fill with ham, cheese, or sautéed veggies for a hearty meal.
- Herb-Infused: Mix in fresh herbs like thyme or chives into the batter for a fragrant, savory flavor boost.

How to Make Classic Crepes
Step 1: Prepare the Batter
In a large mixing bowl, whisk together the flour and salt. In a separate bowl, combine the eggs, milk, melted butter, and vanilla if using. Gradually pour the wet ingredients into the dry, whisking constantly until you have a smooth, thin batter without lumps. For best results, rest the batter in the fridge for at least 30 minutes to relax the gluten and prevent toughness.
Step 2: Heat Your Pan
Use a nonstick skillet or crepe pan and heat it over medium heat. Lightly grease the surface with butter or oil using a paper towel to avoid excess grease, which can make crepes heavy and greasy.
Step 3: Cook the Crepes
Pour about 1/4 cup of batter into the center of the pan and quickly swirl the pan around to evenly spread the batter into a thin layer. Cook for about 1-2 minutes until the edges start to lift and the bottom is lightly golden. Flip carefully with a spatula and cook for another 30 seconds to 1 minute. Transfer to a plate and cover to keep warm while you cook the rest.
Step 4: Serve and Enjoy
Once cooked, fill or top your Classic Crepes with your favorite ingredients and fold or roll them for that perfect presentation and taste.
Pro Tips for Making Classic Crepes
- Rest the Batter: Letting your batter rest improves texture and reduces bubbles for extra smooth crepes.
- Consistent Heat: Keep your pan at medium heat to cook crepes evenly without burning.
- Thin Batter Is Key: Your batter should be slightly thinner than pancake batter to achieve those signature, delicate crepes.
- Use a Nonstick Pan: This ensures easy flipping and perfect crepe edges every time.
- Light Greasing: Use just a little butter or oil on a paper towel to avoid too much grease affecting the crepes’ texture.
- Flip Gently: Use a thin spatula and be patient when flipping to keep crepes intact.
How to Serve Classic Crepes
Garnishes
Top Classic Crepes with fresh powdered sugar, a drizzle of honey or maple syrup, and a sprinkle of fresh berries or sliced bananas for a bright, fresh touch. Whipped cream or a dollop of Greek yogurt also adds a lovely creamy note.
Side Dishes
Pair your crepes with a fresh fruit salad, a crisp green salad for savory versions, or a small bowl of mixed nuts and granola for a balanced breakfast plate.
Creative Ways to Present
For an elegant twist, fold crepes into quarters and stack them, layering with flavored cream or jam between each slice. Alternatively, roll them tightly around savory fillings and slice into pinwheel shapes for parties or brunch gatherings.
Make Ahead and Storage
Storing Leftovers
Place cooled crepes in a single stack separated by parchment paper, then wrap tightly in plastic wrap. Store in the refrigerator for up to 3 days to maintain freshness.
Freezing
For longer storage, freeze crepes in airtight containers or freezer bags with parchment paper between each layer to prevent sticking. They keep well for up to 2 months.
Reheating
Reheat crepes gently in a nonstick pan over low heat or microwave wrapped in a damp paper towel for 15-20 seconds to avoid drying out while warming thoroughly.
FAQs
Can I make Classic Crepes without eggs?
Yes! You can substitute each egg with 1/4 cup of unsweetened applesauce or a flax egg (1 tablespoon ground flaxseed mixed with 3 tablespoons water), but know the texture may be slightly different.
How thin should Classic Crepes batter be?
The batter should be thinner than pancake batter, almost like heavy cream, so it spreads quickly and evenly in the pan for thin, delicate crepes.
Do I need a special pan to make crepes?
A nonstick skillet or crepe pan with low edges works best for flipping and spreading the batter evenly, but any well-seasoned, flat pan can work.
Can I prepare crepe batter ahead of time?
Absolutely! Batter can be made up to 24 hours in advance and kept chilled in the refrigerator to save time and improve texture.
What fillings work best with Classic Crepes?
Almost anything! Sweet favorites include Nutella, jam, fresh fruit, or whipped cream, while savory options like cheese, ham, spinach, and eggs create satisfying meals.
Final Thoughts
Once you nail the technique, Classic Crepes become a delightful staple you’ll want to make again and again. They’re incredibly versatile, easy to prepare, and taste like a little piece of France on your plate. So go ahead, try this recipe, and enjoy the magic of those thin, tender crepes—perfect every time.
Related Posts
- Why Mochi Brownies with Coconut Milk Taste Amazing
- How to Make Red Velvet Brownies Perfectly
- Irresistible No-Bake Oreo Truffles You’ll Love
Classic Crepes
Master the art of Classic Crepes with this easy-to-follow recipe for thin, tender, and versatile French pancakes. Perfect for sweet or savory fillings, these delicate crepes are quick to make, budget-friendly, and suitable for various dietary needs.
- Prep Time: 10 minutes
- Cook Time: 15 minutes
- Total Time: 25 minutes
- Yield: 8-10 crepes 1x
- Category: Breakfast, Appetizers
- Method: Pan-Frying
- Cuisine: French
- Diet: Gluten Free (with substitutions)
Ingredients
Basic Ingredients
- 1 cup all-purpose flour (or gluten-free flour blend for gluten-free version)
- 2 large eggs
- 1 cup milk (or almond, oat, or soy milk for dairy-free option)
- 2 tablespoons melted butter
- 1/4 teaspoon salt
- 1 teaspoon vanilla extract (optional, for sweet crepes)
Instructions
- Prepare the Batter: In a large mixing bowl, whisk together the flour and salt. In a separate bowl, combine the eggs, milk, melted butter, and vanilla extract if using. Gradually pour the wet ingredients into the dry, whisking constantly until smooth, thin, and lump-free. For best results, refrigerate the batter for at least 30 minutes to relax the gluten and improve texture.
- Heat Your Pan: Preheat a nonstick skillet or crepe pan over medium heat. Lightly grease with a small amount of butter or oil using a paper towel to avoid excess grease.
- Cook the Crepes: Pour about 1/4 cup of batter into the center of the pan and immediately swirl the pan to spread the batter into a thin, even layer. Cook for 1-2 minutes until edges lift and the bottom turns lightly golden. Flip carefully with a spatula and cook the other side for 30 seconds to 1 minute. Transfer cooked crepes to a plate and cover to keep warm while you cook the remaining batter.
- Serve and Enjoy: Fill or top your crepes with your favorite sweet or savory ingredients. Fold or roll for a perfect presentation and taste.
Notes
- Let the batter rest for at least 30 minutes to improve texture and reduce bubbles.
- Maintain medium heat for even cooking and to prevent burning.
- Batter should be thinner than typical pancake batter, similar to heavy cream.
- Use a nonstick pan for easy flipping and perfect crepe edges.
- Lightly grease the pan with butter or oil on a paper towel to avoid greasy crepes.
- Flip crepes gently using a thin spatula to keep them intact.
Nutrition
- Serving Size: 1 crepe
- Calories: 110
- Sugar: 1g
- Sodium: 90mg
- Fat: 5g
- Saturated Fat: 3g
- Unsaturated Fat: 2g
- Trans Fat: 0g
- Carbohydrates: 12g
- Fiber: 0.5g
- Protein: 4g
- Cholesterol: 55mg
Keywords: Classic Crepes, French pancakes, thin crepes, sweet and savory crepes, gluten-free crepes, breakfast recipe

